Docker Swarm mode, Traefik and Gitlab - Part 1
Being able to develop an application of any kind and automatically deploy it is the norm nowadays. I have been using dokku in my personal deployment stack for several years now. And at work, we are using Kubernetes. I love the idea of Kubernetes but wanted to try something else, and came across docker swarm mode. In this blog post series, I’m gonna describe the process of setting up a docker swarm cluster, putting traefik in front as a reverse proxy and automatically deploying via gitlab without downtime.
Because this is a big topic, I won’t be able to cover it all in one post. I’m gonna split it into 2 parts.
- First part (this one) will cover the setup of a docker swarm cluster and traefik.
- The next part will cover how to integrate with gitlab and automatically deploy without downtime.
Some clarification before we start, when I use the term “docker swarm”, I mean “running docker engine in swarm mode”. Docker swarm is a separate product and not in active development anymore. I also use the old tool docker-machine to provision virtualbox for demonstration purposes, the new Docker Desktop should be used instead of you are using Mac or Windows.
Set up a docker swarm cluster⌗

First, we need 3 servers, I will use 1 as the manager and the other 2 are worker. I’m gonna use docker-machine and virtualbox to create them locally.
docker-machine create --driver virtualbox local-manager
docker-machine create --driver virtualbox local-worker-1
docker-machine create --driver virtualbox local-worker-2
Let’s verify that they are created correctly
docker-machine ls

NAME             ACTIVE   DRIVER       STATE     URL                         SWARM   DOCKER
local-manager    -        virtualbox   Running   tcp://192.168.99.100:2376           v19.03.5
local-worker-1   -        virtualbox   Running   tcp://192.168.99.101:2376           v19.03.5
local-worker-2   -        virtualbox   Running   tcp://192.168.99.102:2376           v19.03.5
Great, they are all up and running, now we need to ssh into the manager node and initialize the swarm
docker-machine ssh local-manager
docker swarm init --advertise-addr 192.168.99.100
After running that command, docker will show us how workers node can join the swarm
docker swarm join --token some-token 192.168.99.100:2377
Now run that in the other 2 worker nodes, and after that we can verify that we have everything set up correct by running
docker node ls

ID       HOSTNAME       STATUS    AVAILABILITY   MANAGER STATUS  ENGINE VERSION
p1mx...* local-manager  Ready     Active         Leader          19.03.5
sqvu...  local-worker-1 Ready     Active                         19.03.5
p5kj...  local-worker-2 Ready     Active                         19.03.5
Awesome! now let’s deploy something, in the manager node, put this whoami.yml file
version: "3.7"

services:
  whoami:
    image: jwilder/whoami:latest
    ports:
      - 8000:8000
    deploy:
      replicas: 6
Then run the deploy command. Only the manager node can deploy stuff to the cluster
docker stack deploy -c whoami.yml test
Wait few seconds for the deployment, after that you should be able to use docker service ls to see the current service(s)
ID     NAME         MODE        REPLICAS  IMAGE                  PORTS
qo...  test_whoami  replicated  6/6       jwilder/whoami:latest  *:8000->8000/tcp
There are 2 deployment modes:
- replicated mode deploys the image in many containers. We can also specify constraints to tell swarm where to deploy stuff. For example, in production, we might have 1 server dedicated for background job, we can tell swarm to deploy background job image to that particular server through constraints
- global mode deploys exactly 1 container per each node in the swarm cluster. This also abides by the constraints
I don’t want to go too much into details because docker’s documentation has everything. Moving on, now that we have the image ready, we can visit any IP address of any node at port 8000 to access whoami (which btw just prints the container ID). Swarm will automatically send our request to an available node.
Imagine that if this is our application, we would want to push the image to a docker registry, and then after we have published the new image tag, we can run docker stack deploy to roll out the update. However, there are 2 problems here
- Due to the exposed port (8000), anyone can access any node using that port. We probably don’t want that. We need one single reverse proxy to hide all the internal port.
- Our update process is not “zero downtime”. The default update config of docker swarm is
stop-firstwhich means old nodes are stopped first before starting new nodes. This is not desired because we might not be able to start new nodes due to reasons.
I will cover those 2 points in the next part.
Meet traefik, a reverse proxy⌗
I definitely don’t choose traefik because of its funny name

Now that we have our simple whoami service running, we want to close its internal port from the outside world and instead only expose the reverse proxy (traefik) to handle all the public traffic. Traefik will then pick the appropriate server to redirect the incoming requests.
In the manager node, create a proxy.yml file with the following content and run the deployment command
version: "3.7"

services:
  traefik:
    image: traefik:v2.2
    command:
      - --api=true # enable the management api
      - --api.dashboard=true # enable the monitoring dashboard
      - --api.insecure=true # allow insecure access to the dashboard
      - --providers.docker=true # use docker
      - --providers.docker.swarmMode=true # in swarm mode
      - --providers.docker.exposedbydefault=false # but don't pick up services automatically
      - --entrypoints.web.address=:80 # define `web` entry point listening at port 80
    ports:
      - 80:80
      - 8080:8080 # dashboard
    volumes:
      # must mount the docker socket so that traefik can listen to changes
      - /var/run/docker.sock:/var/run/docker.sock
    deploy:
      # this basically says that only deploy 1 per node in every manager node
      # and reserve 128MB of ram to it, also limit the memory to 256MB
      mode: global
      placement:
        constraints:
          - "node.role == manager"
      resources:
        reservations:
          memory: 128M
        limits:
          memory: 256M
Then, verify that we have it up and running
docker service ls

ID     NAME           MODE        REPLICAS  IMAGE                  PORTS
qo...  test_whoami    replicated  6/6       jwilder/whoami:latest  *:8000->8000/tcp
av...  proxy_traefik  global      1/1       traefik:v2.2           *:80->80/tcp
Great! We can now access traefix via any node’s IP. I will assign the manager’s IP to docker-swarm.local, simply add this to /ect/hosts
192.168.99.100 docker-swarm.local
But instead of the container id, we have this…

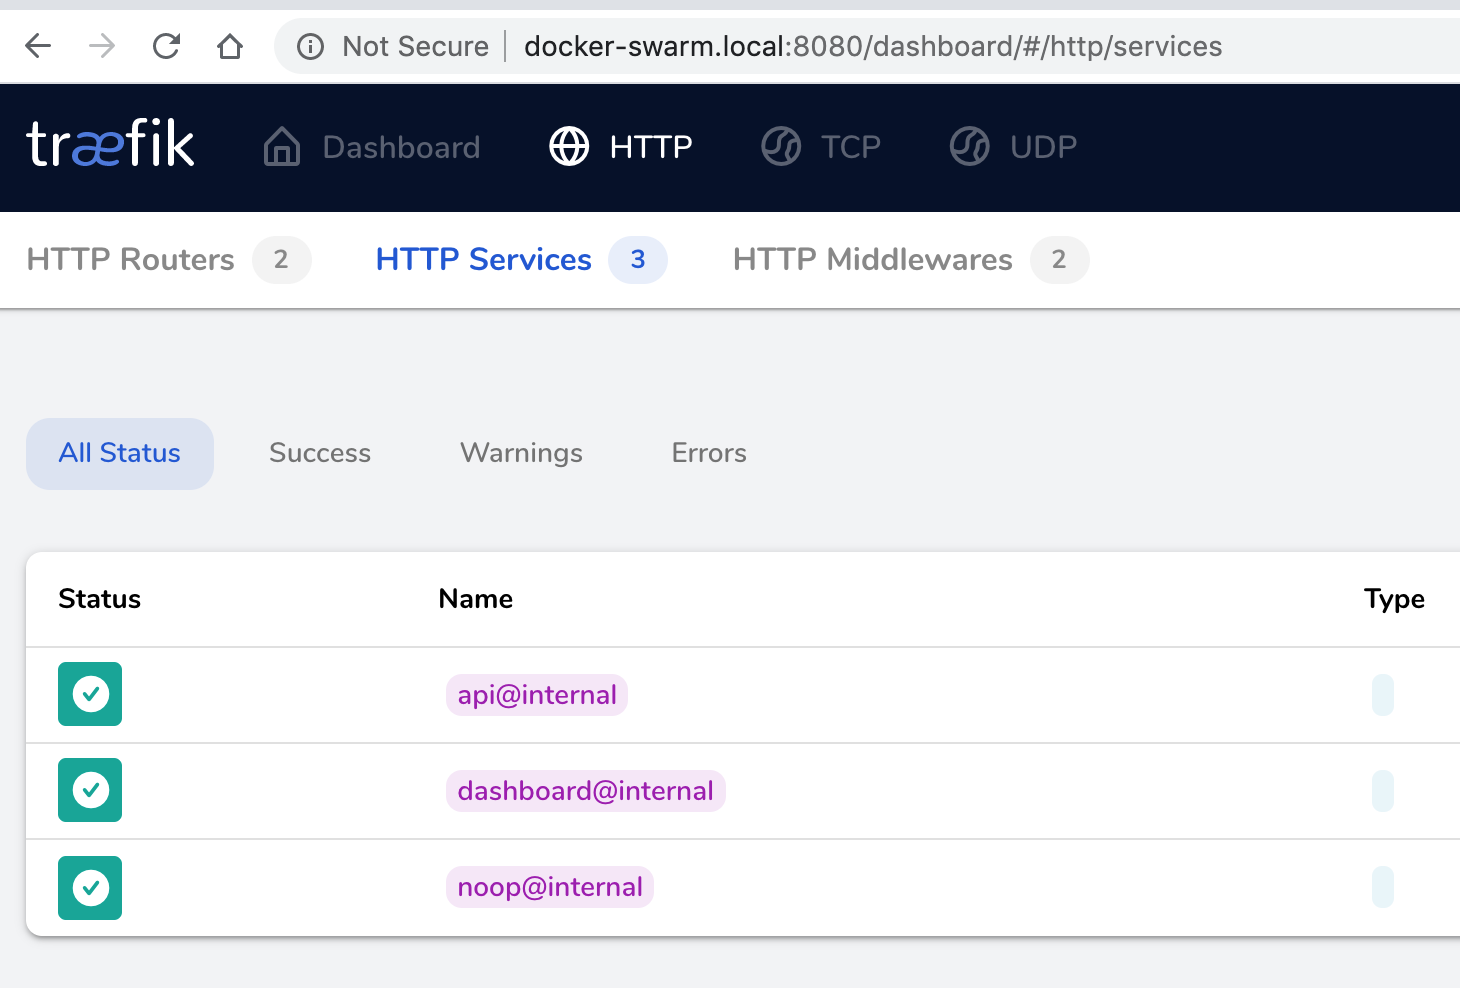
Well, we have just set up traefik, we haven’t tell it to which node it should send the traffic to. This can be verified by accessing the dashboard. We only have the internal stuff running at the moment.

Let’s update whoami.yml to tell traefik that it should send traffic to this service
version: "3.7"

services:
  whoami:
    image: jwilder/whoami:latest
    # ports:
    # - 8000:8000 we don't have to expose the internal port anymore
    deploy:
      replicas: 6
      labels:
        # the most import label to tell traefik that it should pick up this service
        - "traefik.enable=true"
        # by default, traefik picks up the first exposed port, we can explicitly set it
        # to something else here
        - "traefik.http.services.whoami.loadbalancer.server.port=8000"
        # tell traefik to send all requests to `docker-swarm.local` to this service
        - "traefik.http.routers.whoami.rule=Host(`docker-swarm.local`)"
        # the default entry point is `web` which is HTTP
        - "traefik.http.routers.whoami.entrypoints=web"
Run the deploy command again
docker stack deploy -c whoami.yml test
Now we should see this with docker service ls
ID     NAME           MODE        REPLICAS  IMAGE                  PORTS
av...  proxy_traefik  global      1/1       traefik:v2.2           *:80->80/tcp
ws...  test_whoami    replicated  6/6       jwilder/whoami:latest
Now let’s try again… Hey! it still doesn’t work what the heck

“Gateway Timeout” usually means that traefik can’t communicate with the docker containers it pick up. Let’s check the networks.
docker network ls

NETWORK ID          NAME                 DRIVER              SCOPE
9e1475d38cdf        bridge               bridge              local
0fd5af803547        docker_gwbridge      bridge              local
6ae776ce9f3e        host                 host                local
n9or85idy165        ingress              overlay             swarm
7e699eddc6c1        none                 null                local
ua27p80ckoka        proxy_default        overlay             swarm
3l6cuiaqx1tb        test_default         overlay             swarm
pxhs290h4t41        test_proxy_default   overlay             swarm
Apparently, each stack has its own network in addition to ingress which is the default network for the whole cluster. We need to make them all connect to the same network. We can either re-use one of the existing network or create a new one. Let’s create a new one
docker network create --driver=overlay --attachable whoami
After we have created a new network, we need to put traefik into the same network, otherwise it can’t talk to the docker containers
services:
  traefik:
    image: traefik:v2.2
    networks:
      - whoami
    # the rest of the config

networks:
  whoami:
    external: true
And then we need to tell whoami to use the new network instead of its default one
services:
  whoami:
    image: jwilder/whoami:latest
    networks:
      - whoami
    # the rest of the config

networks:
  whoami:
    external: true
Now run
docker stack deploy -c proxy.yml proxy
docker stack deploy -c whoami.yml test
To re-deploy everything, and check docker-swarm.local again, we should be able to see the container ID

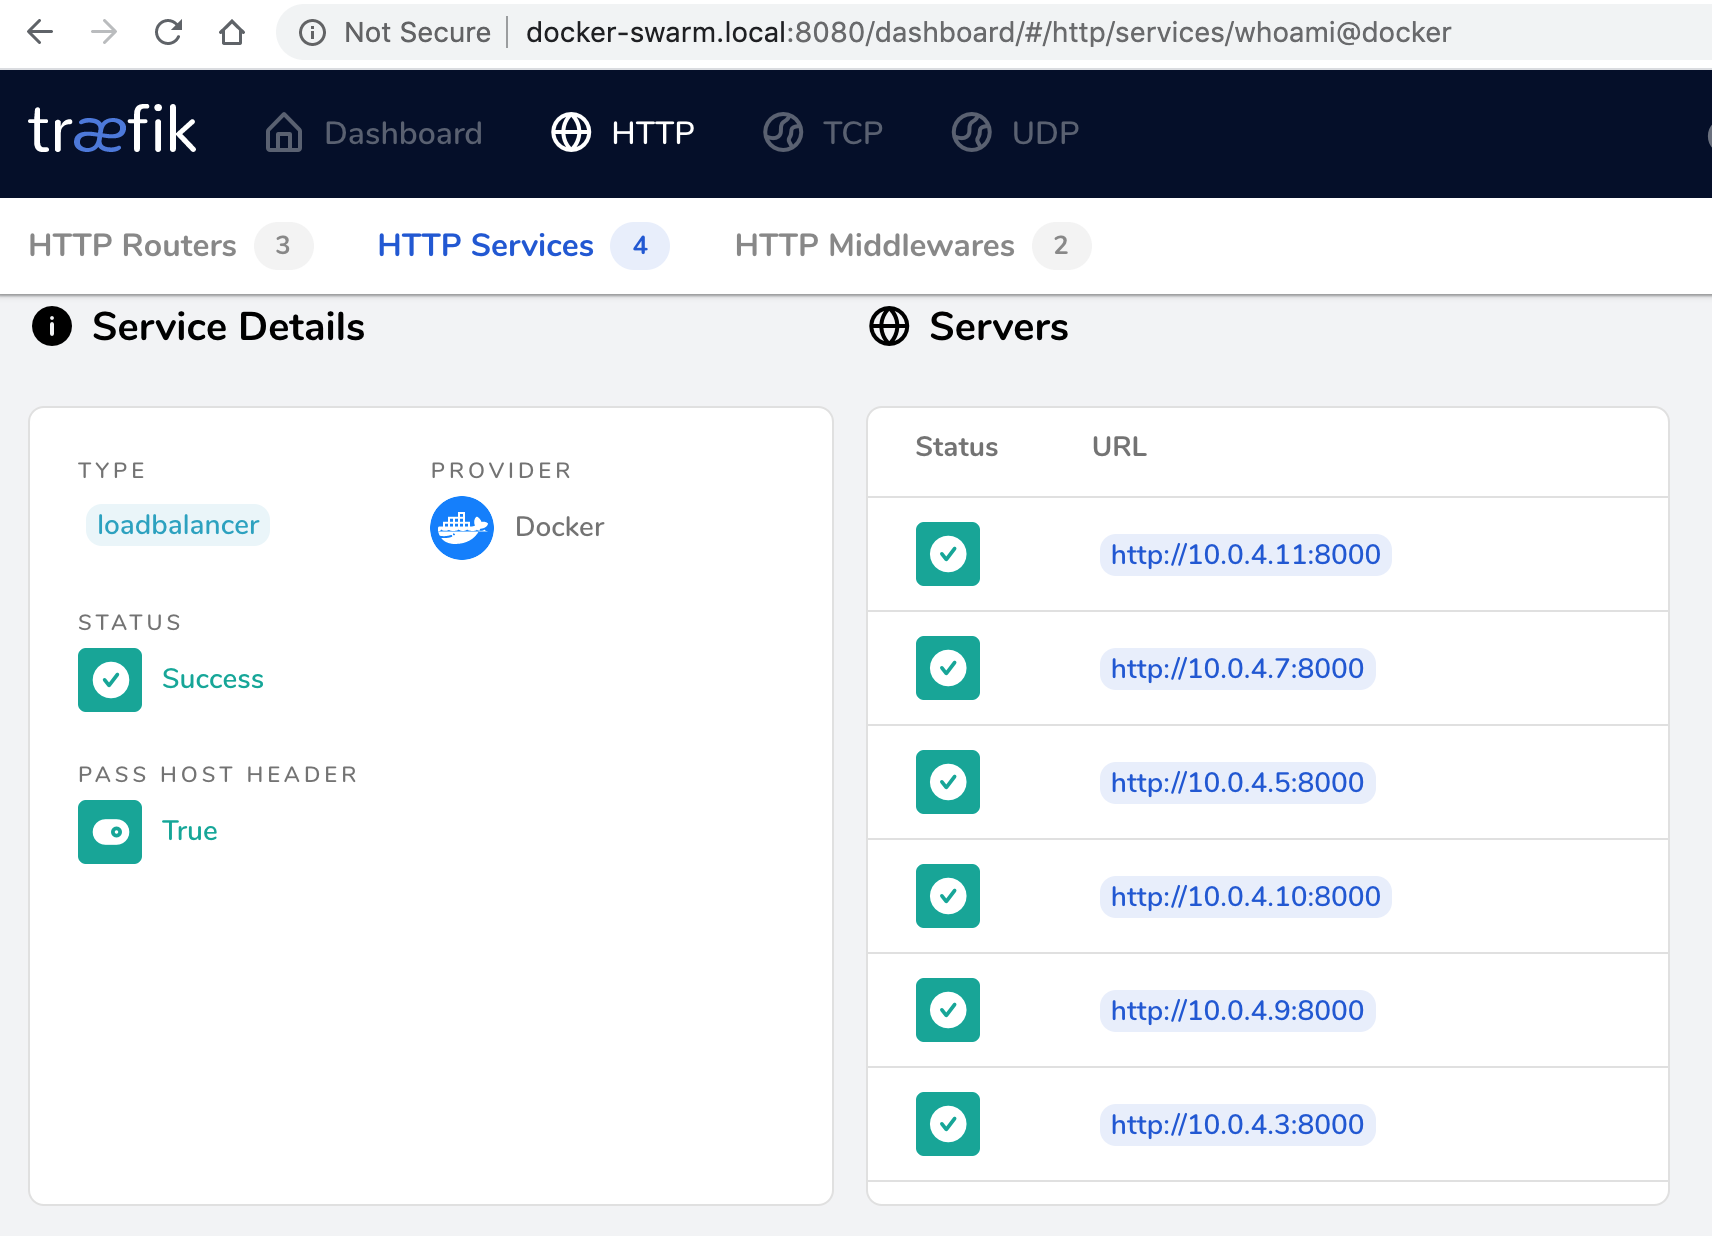
The dashboard also shows proper containers (all 6 of them!)

And that’s everything we need to set up a swarm cluster and traefik. However this is just a basic setup, we still need to properly integrate it with a CI/CD service (gitlab for example) and make it whenever we deploy something, there will be no downtime. I will cover those 2 points in the next part.