Docker Swarm mode, Traefik and Gitlab - Part 2
In the previous part, I’ve shown how to set up a simple swarm cluster with 1 master and 2 worker nodes. In this part, I’m gonna continue with how to configure it to work with gitlab and also achieve zero downtime deployment.
gitlab⌗
Gitlab in a nutshell is a complete devops platform from project planning, source code management to CI/CD and monitoring. You can either host your own gitlab and use gitlab.com. In this blog post, I’m gonna use gitlab.com but everything here should be still applicable to your self-hosted gitlab.
Before we go into details, I need to go through few concepts with Gitlab CI/CD. In gitlab, each project can configure a list of runners for that project (if you have a group, you can configure it at the group level). Runners will execute your build pipelines. You can have 1 or several runners (of the same or different types) per each of your server (I usually have 1 per server and change the concurrency level accordingly). By default, each project will have a shared pool of runners but you are free to set up your own runners and assign them to your projects. To keep it simple, I’m gonna use the shared runners. Each shared runner executes the build pipeline inside a docker container.
Gitlab also comes with a free docker registry which can come in handy when you need to host your own (private) images. The build process usually produces docker images that can be used to deployed into your production server. And there are many other things, but they are outside the scope of this blog post, so I won’t cover them here.
Similar to other CI/CD services, you will need to have a config file with instructions to let the service know how to build your project, in gitlab it’s .gitlab-ci.yml. Let’s get started with the gitlab config file
image: docker:19.03.0
variables:
DOCKER_DRIVER: overlay2
DOCKER_TLS_CERTDIR: ""
services:
- docker:19.03.0-dind
stages:
- Deploy image
docker deploy:
stage: Deploy image
only:
- master
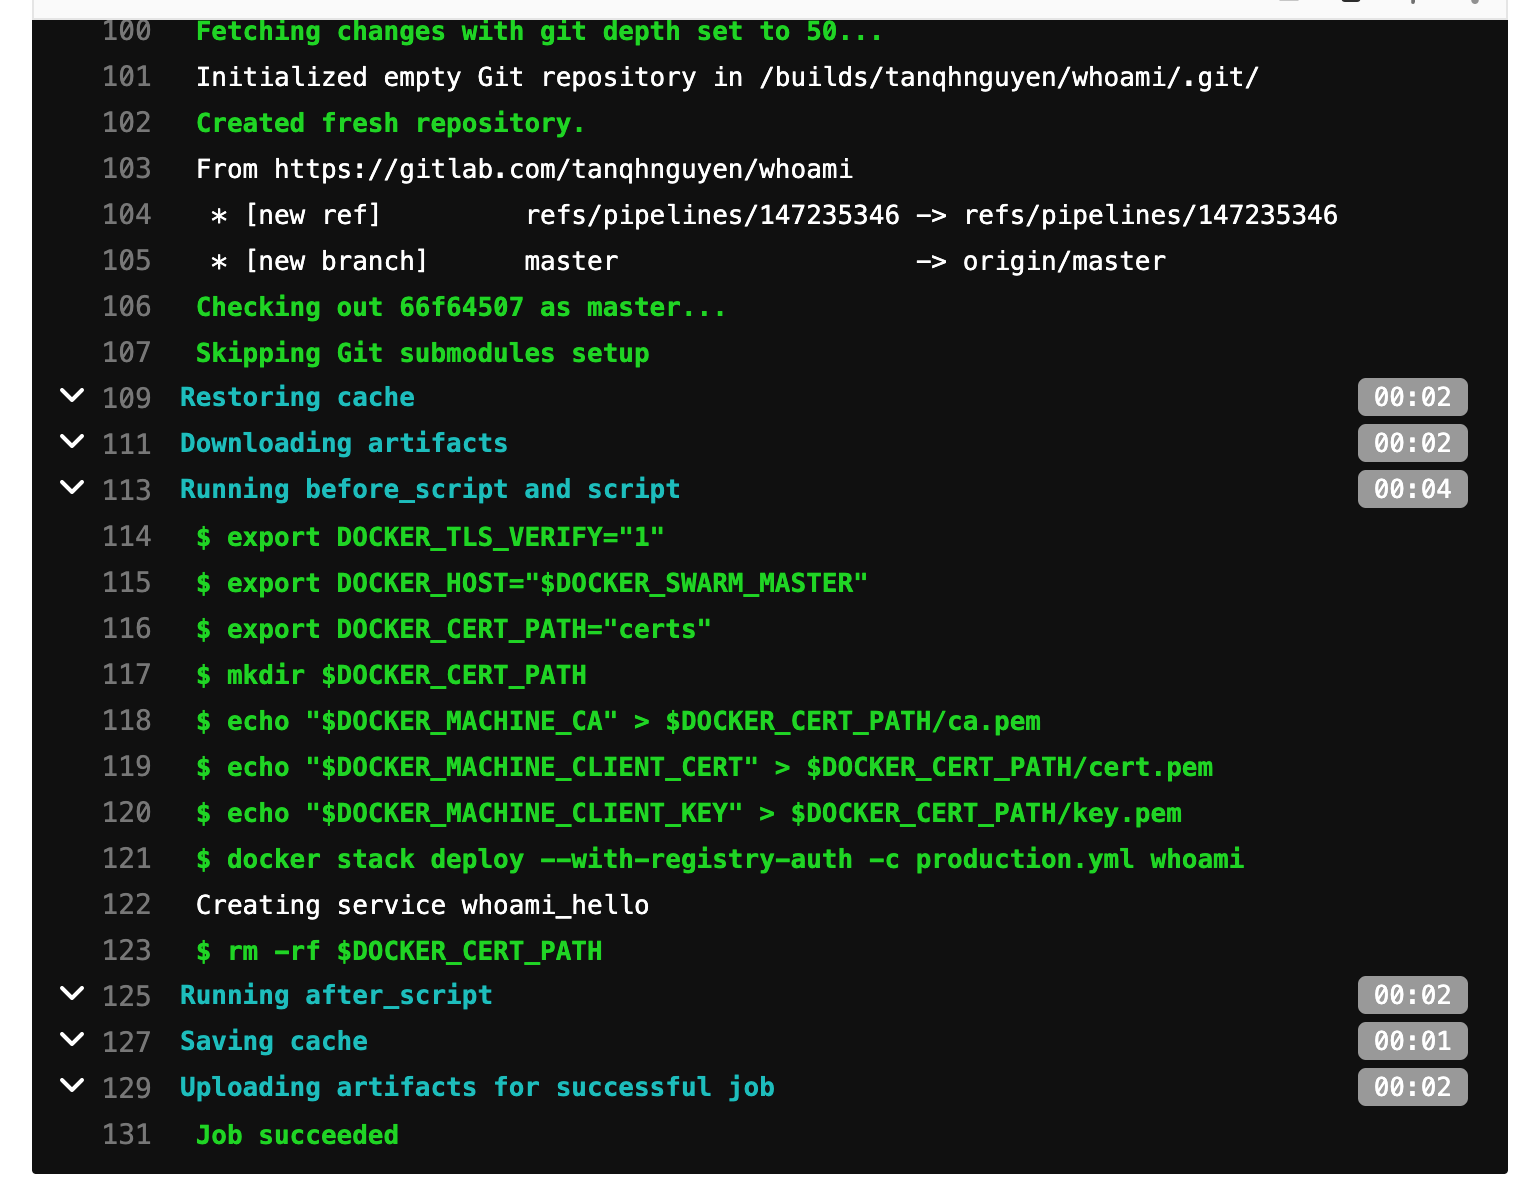
script:
- export DOCKER_TLS_VERIFY="1"
- export DOCKER_HOST="$DOCKER_SWARM_MASTER"
- export DOCKER_CERT_PATH="certs"
- mkdir $DOCKER_CERT_PATH
- echo "$DOCKER_MACHINE_CA" > $DOCKER_CERT_PATH/ca.pem
- echo "$DOCKER_MACHINE_CLIENT_CERT" > $DOCKER_CERT_PATH/cert.pem
- echo "$DOCKER_MACHINE_CLIENT_KEY" > $DOCKER_CERT_PATH/key.pem
- docker stack deploy -c production.yml whoami
- rm -rf $DOCKER_CERT_PATH
In this simple project, I only have 1 stage which is to deploy. In real projects, we will have a lot more, for example, build and run multiple tests etc… Since I’m going to deploy to my own swarm cluster, I need to access to docker (docker-in-docker), that’s why I have to set the image to docker:19.03.0 and include docker:19.03.0-dind as a service. There are several ways to build docker images with gitlab. This is the recommended way, so I will go with it.
In order to connect to my swarm cluster, I need to tell the runner how/where via some environment variables
DOCKER_TLS_VERIFY: enable TLS verification, it’s off by defaultDOCKER_HOST: the URL to the docker server, it’s usuallytcp://ip-address:portDOCKER_CERT_PATH: where to look for the certificates required to connect to the foreign docker server. It’s default to~/.docker, but I don’t like to use the default path, hence the customcertspath
Then we need to generate proper keys to authenticate ourselves. The easier way is to just copy the keys generated by docker-machine when you provision the server with docker-machine. Or follow this guide to generate new ones. To keep it simple, I will copy my docker-machine keys. They are located in ~/.docker/machine/certs
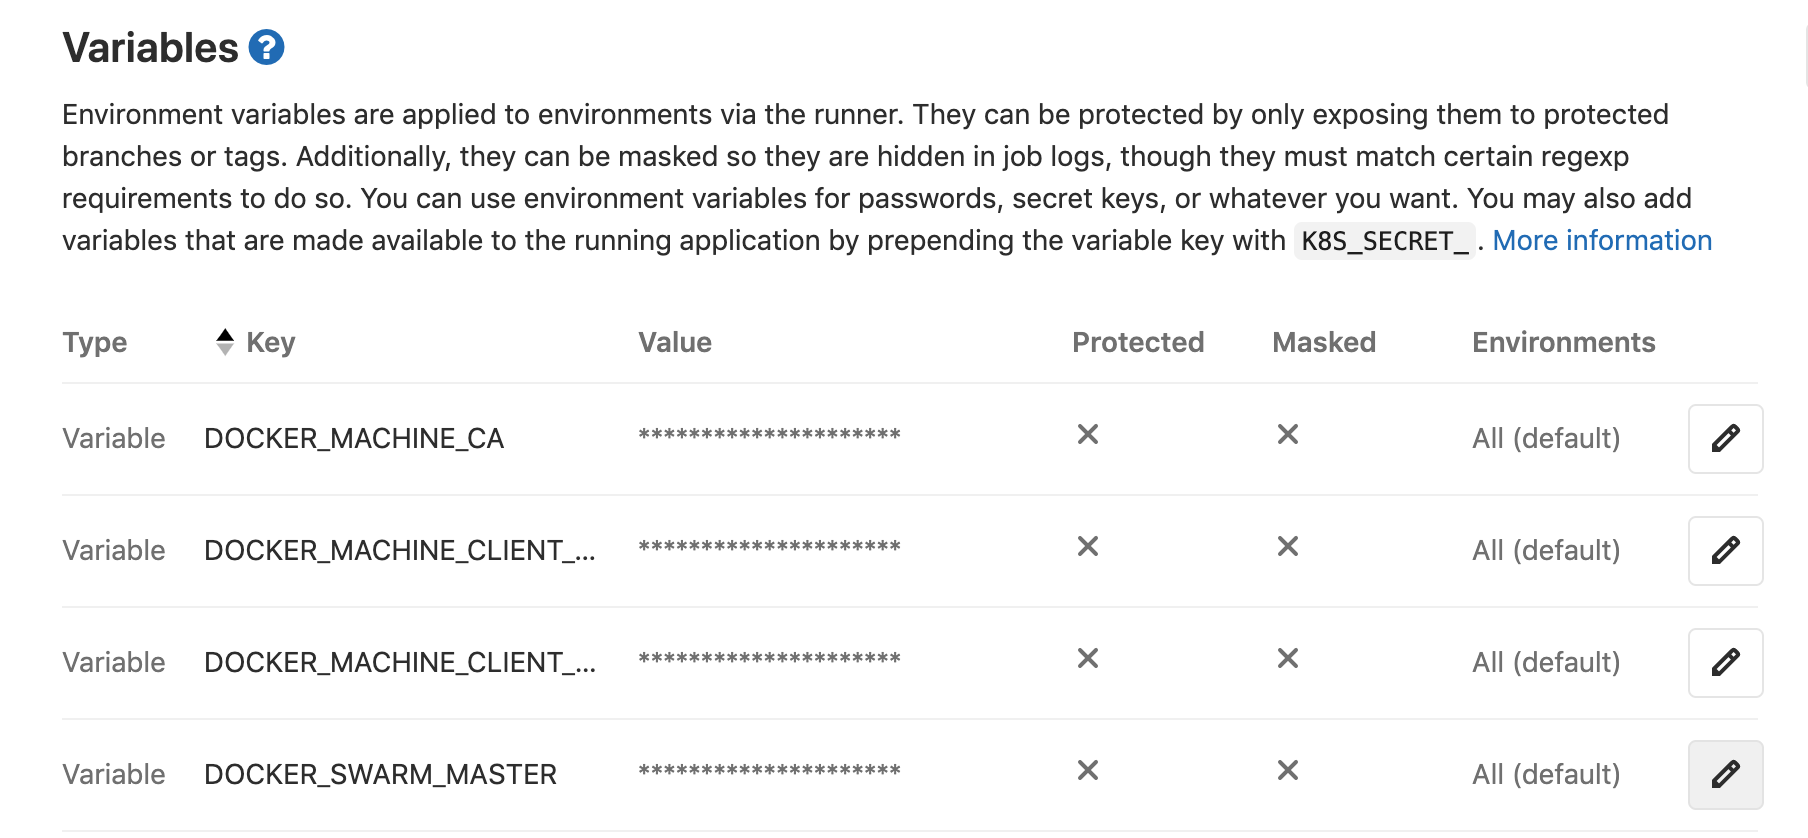
You probably don’t want to store all the secrets/keys in your repository. Gitlab has a feature for you to set environment variables to be injected to your build pipelines. It’s still not the most secured thing, but still a lot better than storing all the sensitive stuff in your repository
And then I can simply run docker stack deploy -c production.yml whoami to deploy a new service to my swarm cluster. Then, at the end of my deploy step, always remove certs from the build machine just in case. Here is my product.yml
version: "3.7"

services:
  hello:
    image: jwilder/whoami:latest
    networks:
      - flix
    deploy:
      replicas: 2
      labels:
        - "traefik.enable=true"
        - "traefik.http.services.whoami.loadbalancer.server.port=8000"
        - "traefik.http.routers.whoami.rule=Host(`whoami.tannguyen.org`)"
        - "traefik.http.routers.whoami.entrypoints=web-secured"
        - "traefik.http.routers.whoami.tls.certresolver=mytlschallenge"

networks:
  flix:
    external: true
The only new thing here is tls option, it’s there because I have Let’s Encrypt enabled for my domain, so everything must be https. flix is my internal ingress network. And here is an example of my build.
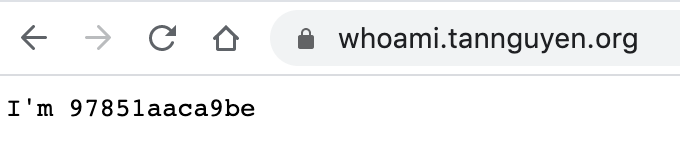
And here is the live version of whoami
Zero downtime deployment⌗
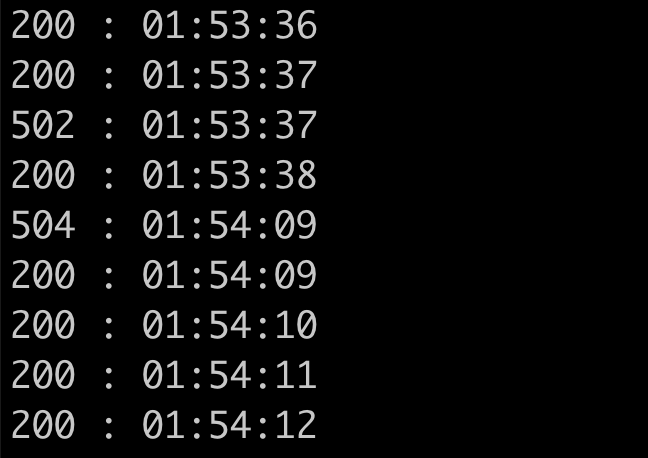
Now that we have simple pipeline, let’s see if there is any zero downtime deployment built-in already. In order to test this, I will simply repeat a curl command to talk to whoami while it’s being deployed. I won’t use anything fancy, just a simple bash command
bash -c 'while [ 0 ]; do curl -s -o /dev/null -w "%{http_code} : " https://whoami.tannguyen.org; date +%H:%M:%S; sleep 1; done'
And here is what happens during the deployment. My requests were interrupted twice during the deployment which means that we are losing 2 of those requests. It’s gonna be a disaster if you have thousands of requests per second and each time you deploy something, half (or even more) of those requests are dropped.
So, what’s wrong? There are several things
- We don’t have a health check mechanism to let swarm know that our container is alive and healthly
- We need to tell the load balancers (there are 2 of them!) how to handle the deployment process. As I mentioned, there are 2 load balancers, one is traefik and the other one is the internal ingress load balancing that swarm provides. We can’t use both, need to pick one, I’m gonna pick swarm because that way I can freely switch to another reverse proxy in the future without changing my setup
Switch to swarm load balancer⌗
This is what traefik shows when we use its load balancer

There are 2 servers to serve whoami.tannguyen.org. We need to add this new label "traefik.docker.lbswarm=true" to let traefik know that it should use swarm load balancer.
After redeploying, here is what it shows
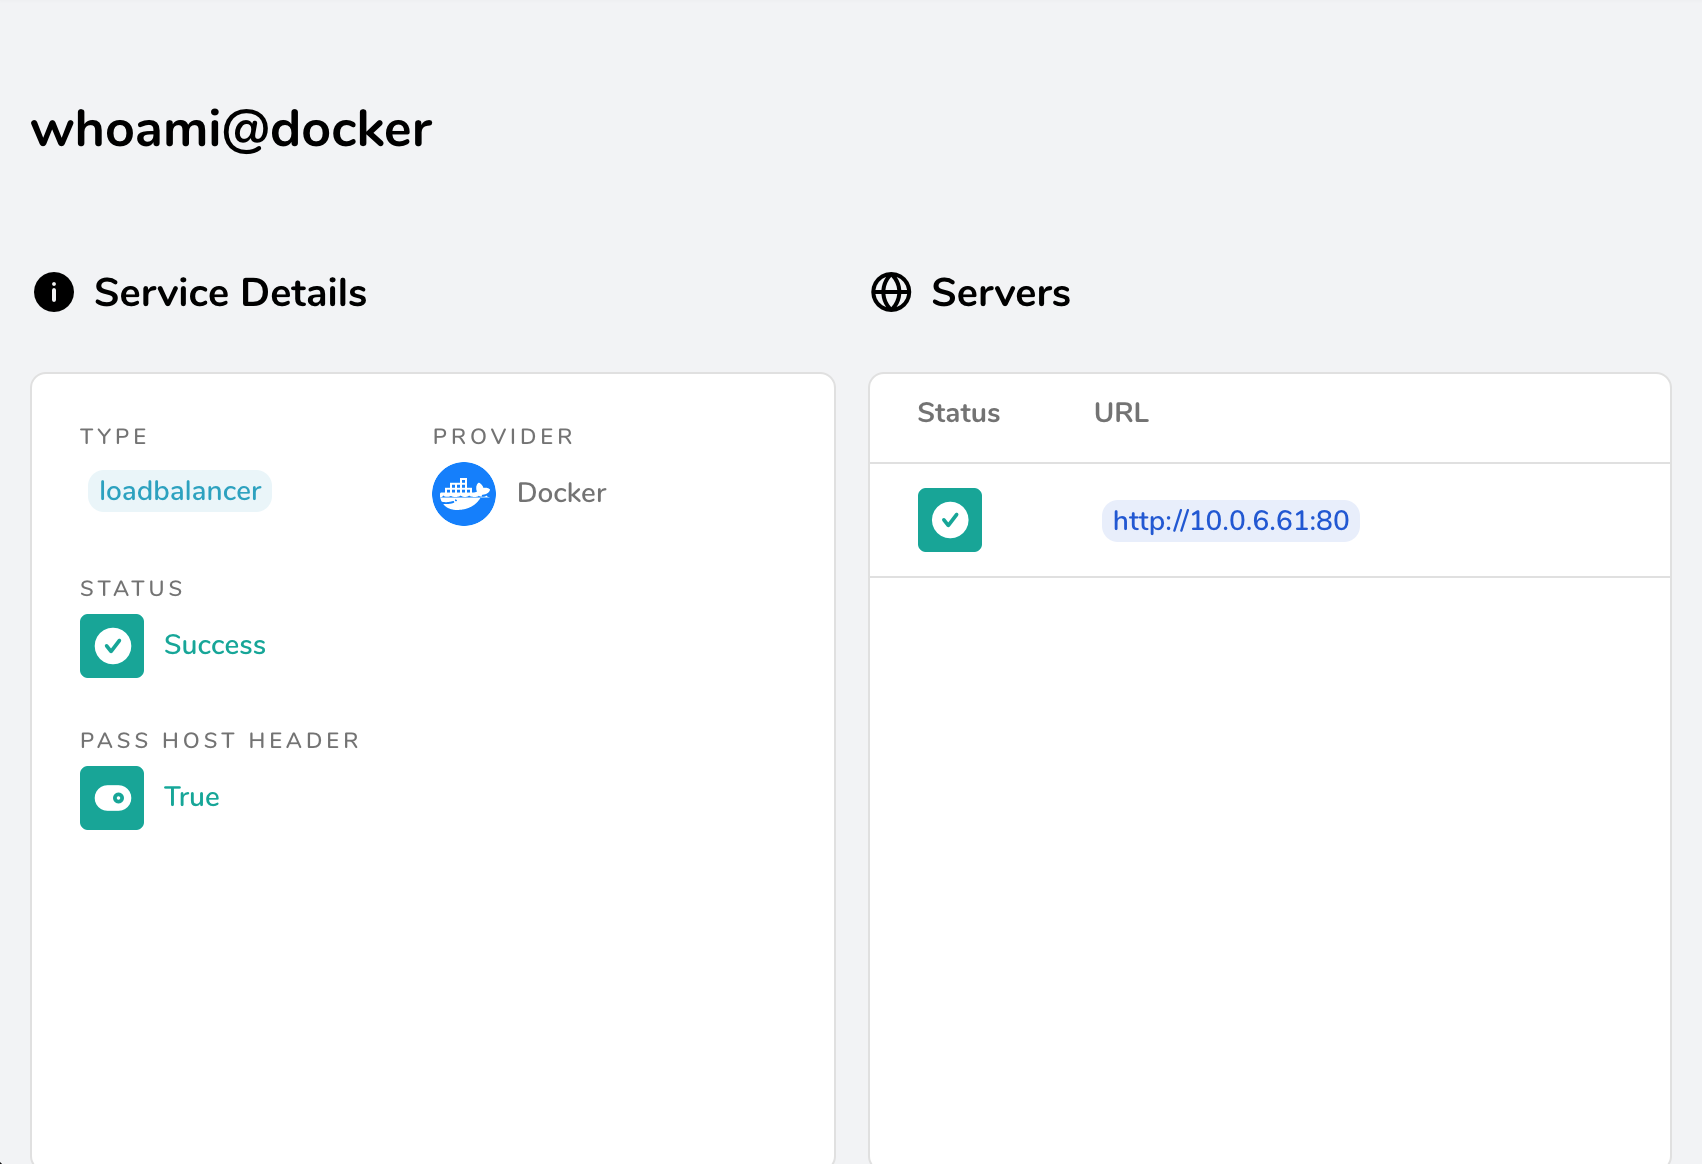
There is only 1 server now and that server is the swarm cluster.
Add some health check⌗
Normally I would define this in the Dockerfile when I build my services but here we use a 3rd party image, so I have to do it in the compose file. Add this to the deployment file, this checks if locallhost:8000 is accessible via wget, you can use anything, I often use alpine as the base image and wget is included.
healthcheck:
  test: "wget --quiet --tries=1 --spider http://localhost:8000 || exit 1"
  interval: "60s"
  timeout: "3s"
  start_period: "5s"
  retries: 3
The main purpose of the healthcheck argument is to let docker know when your container is up and ready to serve. For example this is what it looks like when you do docker ps

Tell swarm how we want it to do rolling updates⌗
Let’s start with the actual configuration (this needs to be added inside the deploy block)
update_config:
  parallelism: 1
  order: start-first
  failure_action: rollback
  delay: 10s
rollback_config:
  parallelism: 0
  order: stop-first
The update-config tells swarm that we want to update only 1 container at a time, and in start-first order which means to start new container first, check if it’s healthy and shut down the old one (the default is stop-first which is the reverse). And delay is the time between each update.
Then rollback_config tells swarm to roll back everything at once, and in stop-first order.
This is a very simple and naive configuration to get the job done, it totally depends on how many containers you have and how fast you want to roll out the new version.
And here is the full configuration file
version: "3.7"

services:
  hello:
    image: jwilder/whoami:latest
    networks:
      - flix
    healthcheck:
      test: "wget --quiet --tries=1 --spider http://localhost:8000 || exit 1"
      interval: "60s"
      timeout: "3s"
      start_period: "5s"
      retries: 3
    deploy:
      replicas: 2
      update_config:
        parallelism: 1
        order: start-first
        failure_action: rollback
        delay: 10s
      rollback_config:
        parallelism: 0
        order: stop-first
      labels:
        - "traefik.enable=true"
        - "traefik.docker.lbswarm=true"
        - "traefik.http.services.whoami.loadbalancer.server.port=8000"
        - "traefik.http.routers.whoami.rule=Host(`whoami.tannguyen.org`)"
        - "traefik.http.routers.whoami.entrypoints=web-secured"
        - "traefik.http.routers.whoami.tls.certresolver=mytlschallenge"

networks:
  flix:
    external: true
If you do docker ps you can see that the whoami container is marked as healthy.

Now there won’t be any interruption when you deploy a new version, everything should be all 200. However, the old container will still need to handle shutdown properly and gracefully to not drop any job half done or suddenly drop any requests. But that’s implementation details and depends a lot on what you want to do with your containers.
And that’s it! with this we can have a simple swarm cluster!
I find swarm very easy to get started with, it took me about 2,3 hours to get my first cluster started (from zero knowledge about swarm, I didn’t even know it existed). Although, swarm is considered inferior to kubernetes, I think they serve different purposes. If I just need to manage 100 containers, I will just set up a simple swarm cluster to do that. For bigger scale, I will probably go with kubernetes. But everyone seems to pick up and talk about kubernetes, so I just wanted to try something else, never a big fan of “the only solution” mojo, I am more on the side of “use the right tool for the right job”.